Real-Time Gesture Recognition in Videoconferencing

by Tomasz Mazur • Jun 10, 2025 • 8 min read
Real-Time Gesture Recognition in Videoconferencing cover image

Chances are, you’ve come across gesture recognition before. If you’ve ever given someone a thumbs up with Apple’s Reactions or played around with Snapchat or TikTok filters, your device was recognizing your gestures in real time.

Gesture detection is quickly going mainstream, making remote conversations feel more natural and engaging. Let’s explore how to detect hand gestures in JavaScript running in the browser and build a simple videoconferencing app with special effects.

Detection of a thumbs up gesture
Apple’s Reactions in action

What is gesture recognition?

Gesture recognition is a technology that finds and identifies hand gestures in images and video. It’s closely related to pose detection, which identifies and tracks the positions of people in an image or video. What’s more, it’s commonly used to add effects to a video or image source based on the detected gestures.

AI-powered features in videoconferencing

Gesture recognition or gesture control falls into a broader category of videoconferencing features that use AI to enhance the user’s experience. Other common features include:

  • background blur
  • virtual backgrounds
  • automatic transcription

Challenges in real-time gesture recognition

Unfortunately, real-time gesture recognition is hard to implement (especially in the browser!), since it combines multiple traditionally difficult tasks: computer vision, low-latency videoconferencing and real-time video compositing.

Running AI models and low-latency streaming are resource-heavy tasks that rely on a range of advanced browser APIs like Web Workers, WebRTC, WebGL, and, more recently, WebGPU. Video compositing in the browser has been around for a while, but it’s only recently gotten more attention thanks to the new WebCodecs and experimental Insertable Streams APIs.

Implementing gesture recognition in videoconferencing

Now, we’re going to build a simple React app that lets users join video calls and trigger visual effects whenever they make a ‘timeout’ gesture — because sometimes, a conversation just needs a reset.

Final product with gesture recognition

To build this app, we need to pick the right tools for the job. There are three key challenges to solve, which we’ll break down below.

Detecting gestures in real-time

To detect gestures in real-time, we’re going to use MediaPipe for its hand landmark detection model. They also have a ready-to-go gesture recognition model, but it doesn’t fit our specific use case. For other AI-powered features, you may want to look at Tensorflow.js and Transformers.js.

Video compositing in real-time

To render video effects, we’re going to use Smelter for its speed and simple component-based API.

It’s written in Rust and primarily designed for server-side compositing, but thanks to a new WASM build, it can now run entirely in the browser. At the moment, this build works only in Chrome and Safari, though we’re actively working on support for other popular browsers. If you need to target every platform, your safest bet is the built-in HTML Canvas API, but beware, there be dragons.

Real-time communication

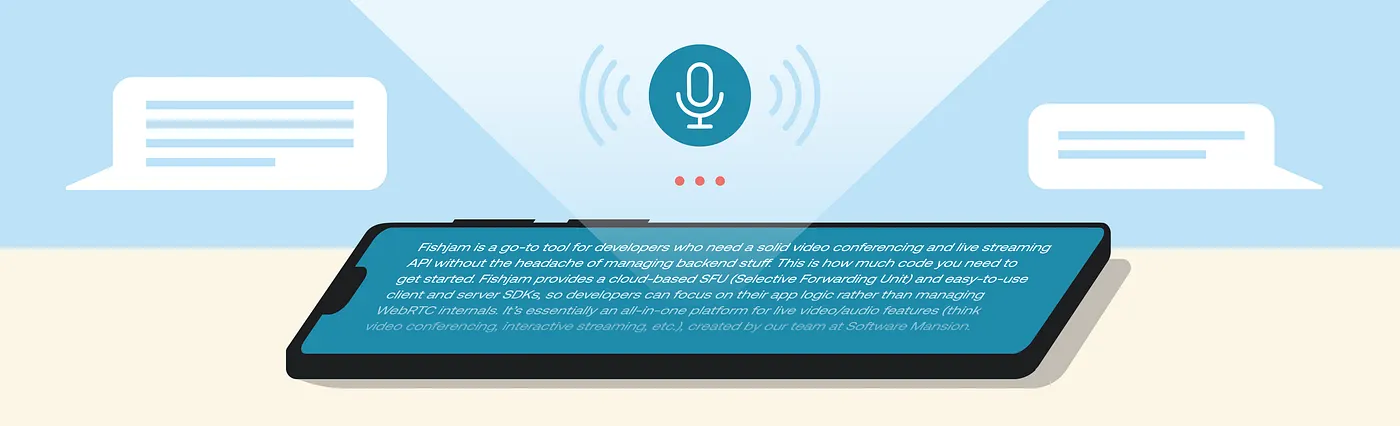
This is the backbone of our videoconferencing application. The collection of protocols that allows us to achieve low-latency videoconferencing is called WebRTC. Implementating WebRTC manually requires a lot of development time and infrastructure, so we’re going to use Fishjam (a live streaming and video conferencing API), because its room manager allows us to prototype for free, without our own backend server.

Obtaining the camera’s video stream

To start detecting gestures, we need to obtain the video stream from our device’s camera. Normally, we would call the built-in getUserMedia() to get a MediaStream, but we’re going to use Fishjam’s useCamera hook, which integrates the above API with the React lifecycle:

export default function App() {
...
const { cameraStream } = useCamera();
...
}

Detecting gestures with MediaPipe

Gesture recognition is the most resource-intensive part of our app, so we’re going to have to be careful with how and where we run it. To prevent blocking the main thread when running the hand landmark detection model, we’re going to use Web Worker to run the detections asynchronously.

Diagram of communication between main thread and web worker

Below, you’ll find the complete code for the Web Worker. It receives messages containing VideoFrameobjects and replies with any hand landmarks it detects.

// worker.js

let landmarker;

const init = async () => {
const { FilesetResolver, HandLandmarker } = await import(
"@mediapipe/tasks-vision"
);
// load the correct WASM bundle
const vision = await FilesetResolver.forVisionTasks(
"https://cdn.jsdelivr.net/npm/@mediapipe/tasks-vision@latest/wasm",
);

landmarker = await HandLandmarker.createFromOptions(vision, {
baseOptions: {
modelAssetPath:
"https://storage.googleapis.com/mediapipe-models/hand_landmarker/hand_landmarker/float16/latest/hand_landmarker.task"
},
runningMode: "VIDEO",
numHands: 2,
});
};

init();

self.onmessage = ({ data: { frame } }) => {
const detections = landmarker?.detectForVideo(frame, frame.timestamp);
frame.close();
postMessage(detections?.landmarks ?? []);
};

Note that we set runningMode: "VIDEO" to benefit from hand tracking, which improves the accuracy of hand detections. We also need to set numHands: 2, as we need to detect 2 hands, while the default value is 1.

The worker on its own isn’t very useful, we also need to capture the camera’s MediaStream and send frames to it from the main thread.

// GestureDetector.ts

export type HandGesture = "NONE" | "TIMEOUT";

export class GestureDetector {
private video: HTMLVideoElement;
private prevTime: number = 0;
private closing: boolean = false;
private worker: Worker;

constructor(
stream: MediaStream,
detectionCallback: (gesture: HandGesture) => void,
) {
this.video = document.createElement("video");
this.video.srcObject = stream;
this.video.play();

// start the Web Worker
this.worker = new Worker(new URL("./worker.js", import.meta.url));
// callback to run when worker responds with landmarks
this.worker.onmessage = ({ data }) => {
detectionCallback(findGesture(data));
this.video.requestVideoFrameCallback(() => this.detect());
};
// begin the gesture detection loop
this.video.requestVideoFrameCallback(() => this.detect());
}

detect() {
if (this.closing) return;

const currentTime = this.video.currentTime;
// check if the video has advanced forward
if (this.prevTime >= currentTime) {
this.video.requestVideoFrameCallback(() => this.detect());
return;
}

this.prevTime = currentTime;
const frame = new VideoFrame(this.video);
this.worker.postMessage({ frame }, [frame]);
}

close() {
this.closing = true;
this.video.remove();
this.worker.terminate();
}
}

The above code does a few things:

  1. It creates a <video> element that will handle playback of the MediaStream.
  2. It starts the Web Worker that will run the MediaPipe model in the background.
  3. It begins the gesture detection loop, by repeatedly calling requestVideoFrameCallback(), which allows us to run code when the video frame changes.

Recognizing the “timeout” gesture from hand landmarks

In the GestureDetector implementation, we use a seemingly magical function called findGesture(), which takes hand landmarks and returns a gesture. But in reality, the function is quite simple; it just checks four things:

  1. Are all fingers straight?
  2. Are the fingers of each hand pointing in the same direction?
  3. Are the hands positioned perpendicular to each other?
  4. Is the tip of the middle finger on one hand placed in the palm of the other?

If the answer to all four questions is yes, then it’s a clear ‘timeout’ gesture! If you want to know the specifics of how to check the above conditions, then you can check out the demo’s source code.

Lastly, we’re going to integrate GestureDetector with the React lifecycle by creating a useGesture hook:

export const useGesture = (stream: MediaStream | null) => {
const [gesture, setGesture] = useState<HandGesture>("NONE");

useEffect(() => {
if (!stream) return;
const detector = new GestureDetector(stream, setGesture);

return () => {
detector.close();
setGesture("NONE");
};
}, [stream]);

return gesture;
};

Adding effects to the video stream

The last thing we need to do is trigger an effect when we detect the"TIMEOUT" gesture. As shown in the GIF below, we want some text to slide in, pause, and then slide out.

Final product with gesture recognition

To add effects to the camera stream, we need to register it as an input with Smelter:

const { cameraStream } = useCamera();
...
await smelter.registerInput("cameraStream", {
type: "stream",
stream: cameraStream.clone(),
});

Now that we have the input, we need to set up an output to tell Smelter what to do with it:

const { stream: output } = await smelter.registerOutput(
"modifiedCamera",
<VideoWithEffects
stream={cameraStream}
inputId="cameraStream"
/>,
{
type: "stream",
video: { resolution: { width: 1280, height: 720 } },
},
);
// we can now use output to interact with the modified stream
// e.g. we can tell Fishjam to send the modified stream to others
import { useCustomSource } from "@fishjam-cloud/react-client";
const { setStream } = useCustomSource("custom-camera");
...
setStream(output);

Note that smelter.registerOutput() takes 3 arguments:

  1. The ID of the output
  2. The layout of the output
  3. The options of the output, most notably the type (this can be “stream”, “whip” or “canvas”) and resolution.

The layout is the most interesting part, since it can be a React component, which means the output video layout can be reactive. We’re going to make use of this in our <VideoWithEffects> component:

// VideoWithEffects.tsx

export type VideoWithEffectsProps = {
stream: MediaStream;
inputId: string;
};

const DURATION = 5000;

export default function VideoWithEffects({
stream,
inputId,
}: VideoWithEffectsProps) {
const gesture = useGesture(stream);
const [animating, setAnimating] = useState(false);

useEffect(() => {
if (gesture === "TIMEOUT" && !animating) {
// start the animation
setAnimating(true);
// reset the flag when the animation is done
setTimeout(() => setAnimating(false), DURATION + 500);
}
}, [gesture, animating]);

return (
<View>
<Rescaler>
<InputStream inputId={inputId} />
</Rescaler>
{animating && (
<Animation duration={DURATION} />
)}
</View>
);
}

The components <View> and <Rescaler> are baked into the Smelter Typescript SDK, which has a lot of utilities for creating layouts. The layout is reactive thanks to the useGesture() hook, which allows us to render an <Animation> whenever a gesture is recognized. A simple example implementation of <Animation> is described below:

// Animation.tsx

export type AnimationProps = {
duration: number;
};

type AnimationState = "before" | "pause" | "after";

const START_DELAY = 100;
const WIDTH = 1280;

export default function Animation({ duration }) {
const [animationState, setAnimationState] =
useState<AnimationState>("before");

const durationMs = (duration - START_DELAY) / 3;

// slide in from the right and out to the left
const right = useMemo(() => {
switch (animationState) {
case "before":
return WIDTH;
case "pause":
return 0;
default:
return -2 * WIDTH;
}
}, [animationState]);

useEffect(() => {
setTimeout(() => {
setAnimationState("pause");
setTimeout(() => setAnimationState("after"), 2 * durationMs);
}, START_DELAY);
}, [durationMs]);

return (
<View style={{ top: 0, left: 0 }}>
<Rescaler
style={{ bottom: 0, right }}
transition={{ durationMs, easingFunction: "bounce" }}
>
<Image source="/assets/timeout-text.gif" />
</Rescaler>
</View>
);
}

Try it out yourself!

We’ve covered the core components needed to implement gesture recognition in TypeScript, running right in the browser. If you want to see the full example in action, make sure to check out our hosted demo, or its source code on GitHub. If you’re working on AI-based features with real-time video and you need further help, reach out to us on Discord.

Closing remarks

Real-time gesture recognition isn’t without its challenges, but thanks to tools like MediaPipe, Fishjam and Smelter, it’s getting a whole lot easier, especially on the web. And with powerful solutions like Insertable Streams API becoming more widely available, the future of browser-based video effects looks really promising.

We’re Software Mansion: multimedia experts, AI explorers, React Native core contributors, community builders, and software development consultants.

Related Articles

WebRTC vs HLS — Which One Is Better for Your Streaming Project? cover image

WebRTC vs HLS — Which One Is Better for Your Streaming Project?

by Piotr Wodecki • Oct 6, 2025 • 7 min read

WebRTC vs. HLS — Which One Is Better for Your Streaming Project? Are you a developer who just got tasked with implementing streaming in your app? Perhaps you are wondering whether it’s worth the engineering effort at all? In this article, we’ll guide you through making the right choice between two most common streaming technologies: WebRTC vs. HLS. TL;DR Use WebRTC for latency-sensitive use cases, and HLS for everything else. Instead of spending months building your custom WebRTC solutions and pulling your hair out — use providers. If your application requires sub-second latency for interactive experiences (video calls, remote control, live auctions), WebRTC should be your choice. For traditional streaming scenarios where a few seconds of delay is acceptable, HLS will save you significant time, money, and engineering headaches. Understanding WebRTC and HLS Before we get into the pros and cons, let’s dive into how WebRTC and HLS actually work. That way, you can make better decisions, even in situations this article doesn’t cover. WebRTC — the real-time champion WebRTC is a peer-to-peer set of standards and technologies designed from the ground up for real-time communication. It uses UDP transport (via RTP/RTCP), implements sophisticated congestion control, and includes built-in mechanisms for NAT traversal. WebRTC establishes direct connections between peers when possible, falling back to relay servers (TURN) when necessary. The standard handles everything from codec negotiation to adaptive bitrate streaming, making it incredibly powerful but also complex. It includes mandatory encryption (DTLS-SRTP), supports both audio and video streams, and can even handle arbitrary data channels. However, this complexity is both its strength and its weakness. As WebRTC is a peer-to-peer protocol, it works great for one-on-one calls, but fails to scale to larger meetings by itself. This is where media servers like SFUs (Selective Forwarding Units) come into play. You can find more details in the linked article, but long story short, as the number of calls increases, it becomes harder to manage on your own. In short, WebRTC is great for low latency, but you should consider using managed providers for this purpose, as the raw technology may be too complex for you to handle. To learn more about WebRTC and SFU , check our article. HLS — scalable workhorse HLS takes a fundamentally different approach. Instead of maintaining persistent connections, it segments video into small chunks (typically 2–15 seconds) and serves them over standard HTTP. Clients download a manifest file that lists available segments and quality levels, then fetches segments as needed. This HTTP-based approach means HLS works excellently with existing CDN infrastructure, passes through firewalls and proxies without issues, and scales to millions of viewers with standard web infrastructure. The simplicity of “just files over HTTP” makes HLS remarkably robust and widely compatible. The immediate downside is that the latency and synchronization vary widely depending on the chosen chunk size. This can be a dealbreaker for most applications that require users to be in sync and have the freshest video feed possible. The only transcoding that needs to happen is when the video is initially received. RTMP is usually chosen for this purpose, which requires transcoding into HLS chunks for distribution. This is not that big of a deal, as the computation required scales linearly with the number of streams, not the viewers, as with WebRTC. What to consider when choosing between WebRTC and HLS? WebRTC and HLS are almost polar opposites in their characteristics, which makes choosing between them straightforward, provided you understand your requirements. Latency — the defining difference HLS (2–30+ seconds) The segment-based approach of HLS introduces unavoidable latency. Even with optimized low-latency HLS (LL-HLS), you’re looking at 2–5 seconds minimum. Traditional HLS implementations often have 15–30 seconds of delay due to segment size, buffering requirements, and CDN caching. WebRTC (&lt; 500ms) WebRTC delivers sub-second latency consistently, often achieving glass-to-glass delays under 200ms in optimal conditions. This isn’t just “nice to have” for interactive applications — it’s essential. Try having a conversation with even 2 seconds of delay, and you’ll understand why video conferencing platforms universally choose WebRTC. Synchronization — keeping viewers together HLS can have significant drift between viewers Because each viewer fetches segments independently, HLS streams naturally drift apart. Two viewers watching the same “live” stream might be 10–20 seconds apart. Implementing true synchronization requires additional complexity, like synchronized playback timestamps or external coordination mechanisms. WebRTC can keep everyone on the same page WebRTC’s real-time nature means all participants experience the stream simultaneously. Synchronization happens naturally without additional engineering effort. This is critical for applications such as watch parties, live auctions, or interactive broadcasts , where viewers need to experience events simultaneously. How do they scale? HLS works well with modern infrastructure HLS scales effortlessly to millions of concurrent viewers using standard CDN infrastructure. Adding viewers is simply a matter of serving files to more people — no different from scaling a website. CDNs handle this automatically with edge caching, making global distribution straightforward and cost-effective. The only other thing that you need to handle is transcoding to HLS, as you’ll probably receive the data via RTMP. You can sidestep this issue entirely by using an external service provider, but doing that on your own shouldn’t be too hard. WebRTC is challenging to do on your own WebRTC’s peer-to-peer nature doesn’t naturally scale beyond small groups. Broadcasting to many viewers requires either mesh networks, SFU servers (Selective Forwarding Units), or MCU servers (Multipoint Control Units). Each approach requires significant infrastructure and careful capacity planning. Scaling WebRTC to hundreds of viewers is a very challenging task, and you should know that implementing it on your own can cost you lots of money and dev time. WebRTC scalability is mostly a solved issue, and it’s worth paying for a service that handles this complexity for you. WebRTC vs. HLS — what about the costs? HLS is as cheap as it gets HLS leverages commodity CDN bandwidth, typically costing $0.01–0.05 per GB . The infrastructure can be as simple as a single HTTP server. Operational overhead is minimal since it’s essentially static file serving. WebRTC can get expensive WebRTC requires specialized media servers that process streams in real-time. You’re paying for compute, not just bandwidth. Costs can be 10–100x higher than HLS for the same number of viewers. Additionally, you need STUN/TURN servers for NAT traversal, which adds complexity and cost. The engineering expertise required to operate WebRTC infrastructure reliably is also a significant hidden cost. Paid services usually charge per minute of connection of a single peer and can range from $0.001 to $0.01 per peer connection-minute, which is significantly higher than HLS. There is one special case to mention here — when you just need one-on-one calls. In this case, you can get the system working basically for free. Many applications showcase this, from free P2P file transfer, video calls, to streamer utilities. As long as you don’t need too many participants and server-side control over the call, you can just use the browser’s WebRTC implementation. Ease of implementation and developer experience HLS is as simple as HTTP Implementing HLS playback requires a few lines of code using standard video players. Most platforms have native support (iOS, Android, smart TVs). The streaming pipeline is well-understood: encode, segment, upload to CDN, done. Debugging involves checking HTTP requests and examining manifest files. WebRTC — challenging without abstractions WebRTC implementation, on the other hand, is really complex. You may need to debug: ICE candidate gathering and exchange STUN/TURN server configuration Codec negotiations and SDP offer/answer dance Network topology changes and reconnection logic Browser-specific quirks and compatibility issues Media server scaling and load balancing Experienced teams often spend months or years getting WebRTC right. It’s definitely not a walk in the park. On the other hand, the difficulty of using a set of SDKs for an existing WebRTC provider simply depends on their quality, and can be as easy as an HLS implementation. Making the decision — choose a framework tailored to your project HLS and WebRTC implementation HLS implementation is straightforward enough to build yourself. Depending on your use case and business model, you may still opt for a more managed solution, especially because of the transcoding required on the ingest point from RTMP to HLS. It’s hard to go wrong with any reputable service here, but they may have subtle differences that you should consider. The most important factors to consider when implementing HLS are the chunk size and the CDN provider. Both will directly affect the latency, synchronization, and cost of the solution. We would recommend you steer clear of LL-HLS, as support for this standard can be lacking across platforms, and tuning the segment size will suffice most of the time. But what about WebRTC? Trust me, you don’t want to build your own WebRTC infrastructure. The time and expertise required to make it work, even from existing open-source software, can quickly become expensive. Instead, use managed providers. Infrastructure providers handle the complexity of WebRTC behind abstractions that are much easier to use. When looking for WebRTC providers, you should consider their reliability, developer experience, costs, and any additional features that you may need. Fishjam — making WebRTC truly accessible to developers At Software Mansion, we’ve built Fishjam to make WebRTC easy to use for everyone. We have combined knowledge from our multimedia-focused projects, such as Membrane , Smelter , and Elixir WebRTC , and React Native open-source libraries like Reanimated , Screens , and Gesture Handler to craft the best solution, allowing you to add real-time streaming to your mobile and web applications. The journey to release Fishjam took us two years, and it took a lot of existing knowledge from many experienced people. After all that, we can confidently say that WebRTC is haaard , but the good news is that you don’t have to experience that yourself. Fishjam features: Easy-to-use SDKs Seamless integration with AI voice agents, transcription, and moderation services First-party integration with Smelter for programmable transitions, overlays, and interactive experiences (see our demo and the article about it) All at a very fair price You can learn more and try out Fishjam for free at fishjam.io . And if you need any help along the way, don’t hesitate to contact us at contact@fishjam.io. We’re Software Mansion : multimedia experts, AI explorers, React Native core contributors, community builders, and software development consultants. WebRTC vs HLS — Which One Is Better for Your Streaming Project? was originally published in Software Mansion on Medium, where people are continuing the conversation by highlighting and responding to this story.

Building Interactive Streaming Apps: WebRTC, WHIP & WHEP Explained cover image

Building Interactive Streaming Apps: WebRTC, WHIP & WHEP Explained

by Karol Konkol • Jul 8, 2025 • 5 min read

Live streaming has become extremely popular, especially for broadcasting live sports and streaming on platforms like YouTube and Twitch. Today, it’s easy to watch major events online, and that’s starting to take over from traditional forms like watching on TV. The vast majority of streaming platforms use a technology called HTTP Adaptive Streaming (HAS), which enables delivering video to millions of viewers with only a few seconds of latency. But if you want truly real-time, interactive experience, there are a few things to consider. Going beyond traditional TV — WebRTC for new applications If you’re trying to move past the limitations of traditional TV and build something better — with significantly less delay — or if you want to use live streaming in totally new ways, there are plenty of options to consider. Just think about creators being able to interact with the audience in real time, or people joining an online auction and actually participating as it happens. Protocols like HLS (HTTP Live Streaming) or DASH (Dynamic Adaptive Streaming over HTTP) are ideal for video-on-demand or mass broadcasts. However, when low latency streaming is critical and when you can’t afford a delay of even one second, HLS and DASH typically can’t keep up. Fortunately, there is the WebRTC standard, which is perfectly suited for applications that require ultra-low latency and almost perfect synchronization. What is WebRTC and why does it matter? WebRTC was designed for direct communication with very low latency — around 200 milliseconds — allowing natural interactions between participants. The standard is supported by browsers, which simplifies the integration of WebRTC-based solutions. It’s worth keeping in mind that achieving such low latency makes WebRTC a complex solution that incorporates many different protocols such as ICE, TURN, STUN, DTLS, SDP, and many others. This, in turn, often translates into troublesome implementation, debugging, and usage. Plus, WebRTC doesn’t actually specify how connections are established — so, theoretically, they could even involve carrier pigeons. As a result, each implementation of a WebRTC-based solution varies, which adds complexity and means each streaming server needs its own approach to setting up connections. WHIP &amp; WHEP protocols — simplifying WebRTC for broadcasting In broadcasting scenarios, the connection establishment has been standardized by the WHIP and WHEP protocols, which clearly define how the process should work. These protocols rely on the HTTP protocol and strictly specify the sequence of messages sent to establish connections, making the process easier. WHIP (WebRTC-HTTP ingestion protocol) focuses on stream ingestion , allowing broadcasters to send live media to WebRTC-compatible servers by leveraging HTTP(S) for signaling. This simplifies the setup for sending live streams over the internet. On the other end, WHEP (WebRTC-HTTP egress protocol) deals with the distribution aspect , enabling straightforward delivery of live streams from WebRTC servers to the end-users. This helps reduce latency and improve quality of service by keeping the streaming experience stable and consistent. By leveraging WHIP and WHEP, you can use the same implementation, applications, or players to receive streams from different providers. This standardization eliminates the need for custom solutions for each provider, lowering development costs and technical barriers for both broadcasters and content creators. As a result, these protocols offer a streamlined framework for efficiently managing the entire live streaming lifecycle — from broadcast to viewer. Building a live streaming app: should you create your own infrastructure or use third-party providers? When creating a streaming product, you have to decide whether to build your own infrastructure or rely on an external provider. Setting up and maintaining your own system can be complex and expensive, so many choose to go with third-party providers instead. However, if you decide to build your own infrastructure, the first challenge is dealing with the WebRTC standard, which can be quite complex when it comes to transmitting multimedia. You basically have two options here: Implementing the standard yourself, which gives you full control over the library and its features. However, this scenario requires having a dedicated and skilled team for implementation and maintenance. Using an existing library and building a multimedia server based on it. Although this is a simpler scenario, it still requires a skilled team capable of effectively debugging WebRTC. And that’s often quite challenging. Once your multimedia server is up and running, new challenges pop up — like keeping the quality high, scaling smoothly, and keeping latency low. This means managing geolocation, routing streams across clusters and instances, scaling your multimedia servers properly, and handling all the usual headaches of running a distributed infrastructure. Sounds complex? Well, because it is. But external providers can take these burdens off your shoulders by delivering reliable, high-quality multimedia services and offering tools that make it easier to integrate WebRTC into your custom apps. WebRTC for broadcasting made simple with Fishjam One of the tools that makes live streaming and broadcasting easier is Fishjam. It’s a live-streaming and video conferencing API designed to seamlessly integrate WebRTC into your application, removing the complexity of custom WebRTC implementations and the need for deep multimedia expertise. With ready-to-use React and React Native SDKs, adding live streaming to your app is simple and user-friendly. Plus, thanks to integration with tools like Smelter , it offers much more than just basic streaming. To sum up, Fishjam lets you skip the hard parts and start building fast. Don’t wait, check the website, and be sure to give it a try! And if you need help along the way, feel free to reach out to us at projects@swmansion.com . Want to learn more about Fishjam and its capabilities? Check our video: https://medium.com/media/676f4cfd4d963050a698d65fa0a3c21a/href To explore other applications of WebRTC, read our article on Real-Time Gesture Recognition ! We’re Software Mansion : multimedia experts, AI explorers, React Native core contributors, community builders, and software development consultants. Building Interactive Streaming Apps: WebRTC, WHIP &amp; WHEP Explained was originally published in Software Mansion on Medium, where people are continuing the conversation by highlighting and responding to this story.